
NextChapter's powerful CRM and add-on tools are now available for all practice areas, not just bankruptcy. We’ve made some updates, including more options for customizing data fields. Let’s walk through getting set up with custom workflows and creating custom fields.
Choose your practice areas
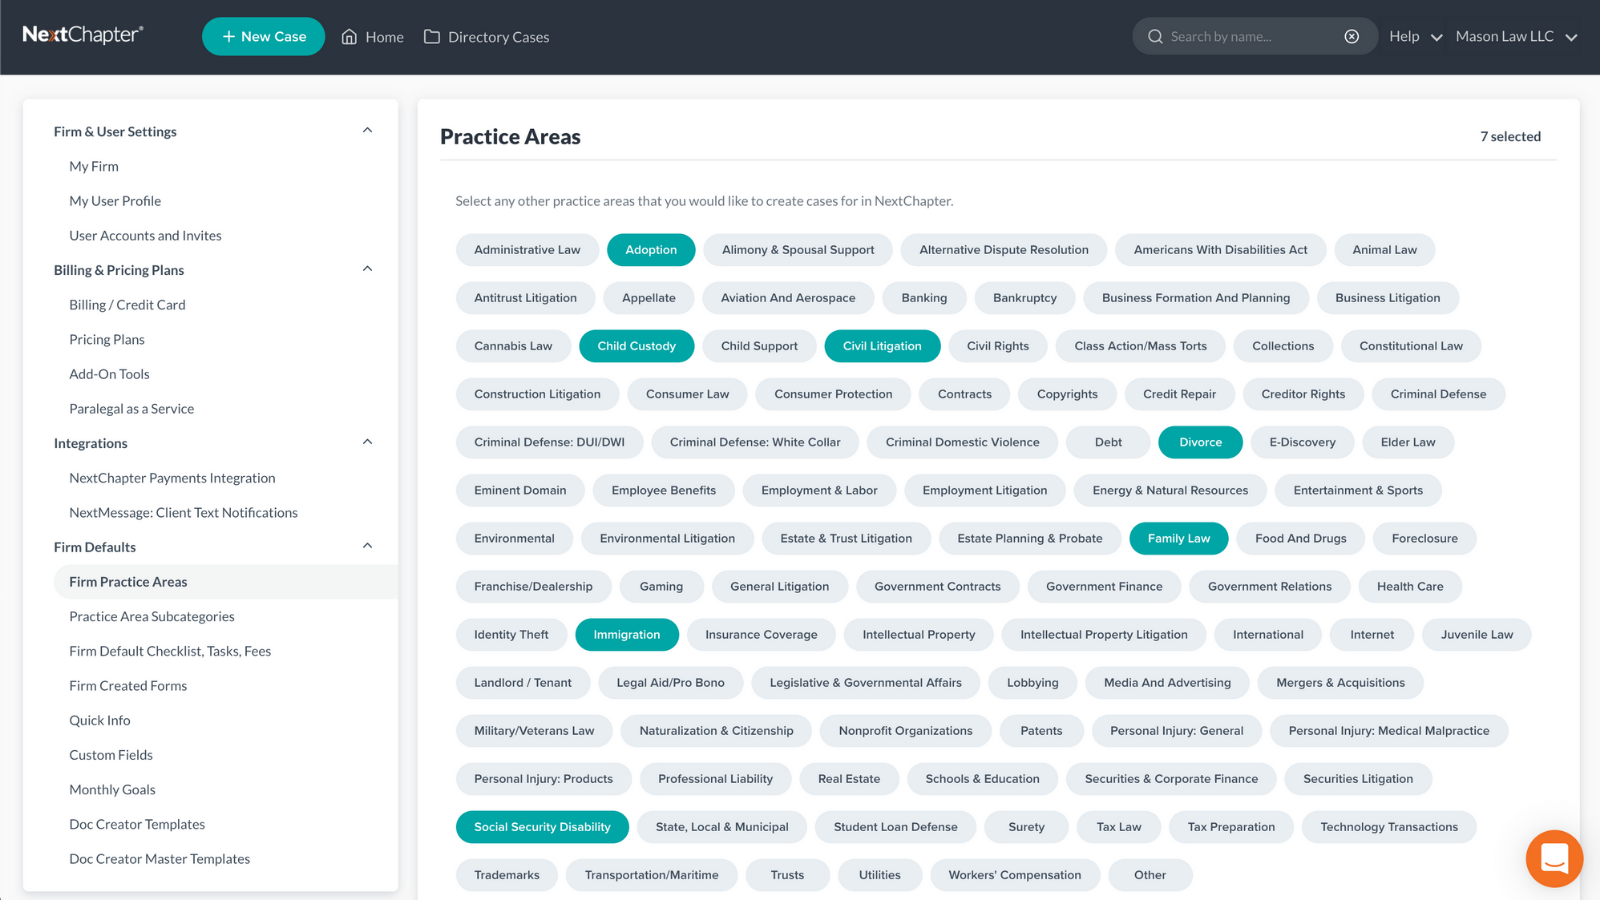
In your account settings, click "Firm Practice Areas" on the left-hand side, and begin selecting your practice areas. You can pick from pre-set areas like immigration, divorce, civil litigation, and much more. Or, click "other" and set up your own practice area. There is no limit, so make sure to select each area you practice!
Setting up custom workflows
Each of your practice areas is different, so you need tools that you can customize for your firm and your cases. NextChapter allows you to set up custom workflows, including these key tools:
-
Document checklists: never miss a form requirement and track progress
-
Tasks: stay on top of deadlines, statuses, and who is responsible for a task
-
Fees: it’s easy to track billable hours and send client invoices as needed
-
Events: schedule meetings and appointments seamlessly
-
Monthly goals: create specific monthly goals in Account Settings for each practice area and track your status under the Monthly Progress section on your dashboard
-
Case status: you can always view where cases currently sit

Set up custom workflows for each practice area, and everything will be organized for you within NextChapter, making it easy to keep each area of law you practice separate.
Creating custom fields
NextChapter for all practice areas now allows you to create custom fields, which help you collect data from your clients and track it easily within their case. You can also merge data into your case documents and client portals with custom fields.
It's easy to set up custom fields. All you have to do is head to your Account Settings, select the proper practice area from a drop-down menu, and then go into > Firm Details > Custom Fields, and then select +New Field. You can either create your own fields or use SALI fields (discussed more below).

Choose your field type, whether a text or long text field, checkbox, date, currency, and other type options based on the task at hand. Depending on the field type you need, you’ll have differing entry forms to complete. You can always add a new option for your field types.
After completing your custom fields, enter or start a new case and find them in the Custom Fields section on the left-hand side of your dashboard. Start filling out the info in these fields and complete cases easier than ever before!

These fields can also be used in our document automation tool and will be soon available in our Client Portal for your clients to fill out themselves.
SALI fields
As mentioned, you can create custom fields using SALI fields, created by the Legal Matter Standard Specification (LMSS) in the attempt to deliver better industry standards for efficient and innovative legal services.
When you’re creating your custom fields in NextChapter, simply click on “Select Field from LMSS” and view all available fields. Click on the field you want and then save it. You can also find SALI fields by typing in the Field Name box, and you’ll see a preview of available fields based on your search.

We highly recommend using SALI when creating custom fields for more consistency across platforms and the legal industry as a whole. You can find out more about creating custom fields using SALI standards here.
More to come from NextChapter!
Custom fields can be used in Client Texting and NextChapter Docs, and will soon be available in our Client Portal, too, so stay tuned for more blog posts that dig into how those fields work.